Reading List
The most recent articles from a list of feeds I subscribe to.
Antilibrary: the perfect excuse to buy more books
From Anne-Laure Le Cunff:
An antilibrary is a private collection of unread books. […]
The goal of an antilibrary is not to collect books you have read so you can proudly display them on your shelf; instead, it is to curate a highly personal collection of resources around themes you are curious about. Instead of a celebration of everything you know, an antilibrary is an ode to everything you want to explore. […]
An antilibrary creates a humble relationship with knowledge. It reminds us that our knowledge is finite and imperfect.
I have more unread books than read, and at some point I decided to stop buying books until I read more of the ones I owned.
After learning about the antilibrary, I lifted my own restriction and started to buy books again. The result: I’ve been reading more than ever.
Vite with Laravel: Using TypeScript
Vite transpiles TypeScript out of the box.
Vite only performs transpilation on
.tsfiles and does NOT perform type checking. It assumes type checking is taken care of by your IDE and build process.
If you like to see type errors in your terminal (like me), you’ll need to add extra tooling. I solved this by running a parallel type check process with concurrently.
First, add concurrently to your dependencies. Then update your dev script to run a TypeScript watcher in parallel with Vite.
 {
"private": true,
"scripts": {
+ "dev": "concurrently \"npm run vite --clearScreen false\" \"npm run tsc -w --preserveWatchOutput\"",
 "production": "vite build"
},
"devDependencies": {
"axios": "^0.21",
+ "concurrently": "^6.0.0",
 "lodash": "^4.17.19",
"vite": "^2.1.0",
}
}
Vite’s --clearScreen and TypeScript’s --preserveWatchOutput flags ensure that they don’t both try to reset the terminal while watching, otherwise you’d only see one of the two’s output at a time.
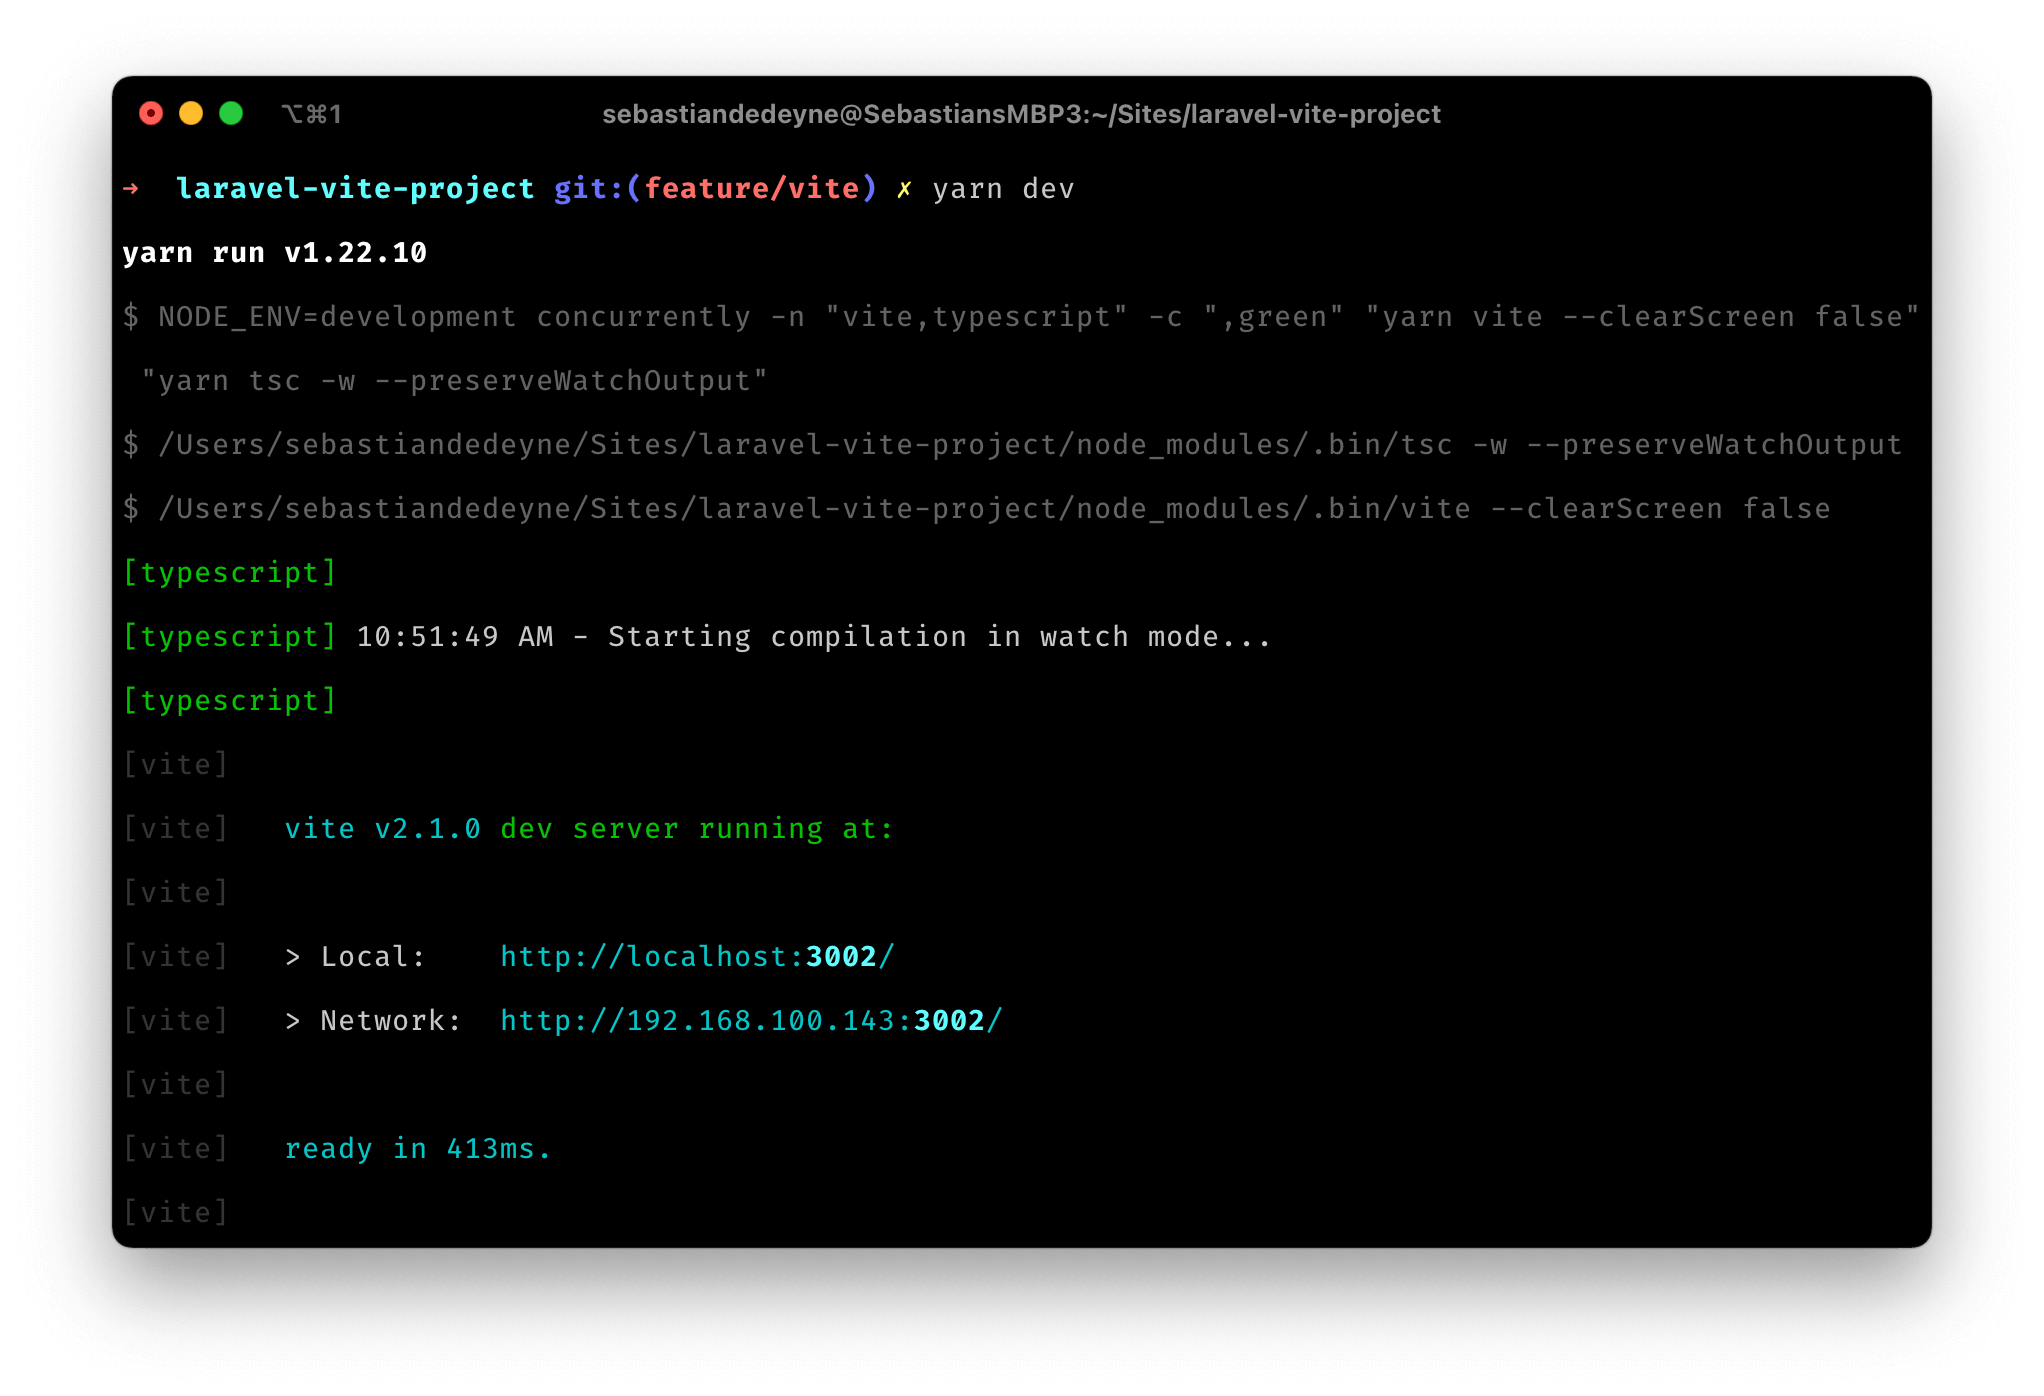
If you want to make the difference between the two processes more clear, concurrently supports naming and color-coding.
concurrently
-n "vite,typescript"
-c "white,green"
"npm run vite --clearScreen false"
"npm run tsc -w --preserveWatchOutput"
With these settings, your output will look like this:
Vite with Laravel: Using React
Vite supports JSX out of the box (you might have to rename .js files to .jsx), so there are no additional steps to get started with React. However, you’ll probably want to enable React Refresh for a better development experience.
React Refresh lets you edit components without losing the current state of your running application. For example, if you’re working on modal that appears after clicking a button, you’d need to reopen that modal every time the page refreshes. With React Refresh, the modal will stay open after the code reloaded, because it’s able to remember the previous state.
To enable React Refresh, install the @vitejs/plugin-react-refresh package.
 {
"private": true,
"scripts": {
"dev": "vite",
"production": "vite build"
},
"devDependencies": {
+ "@vitejs/plugin-react-refresh": "^1.3.1",
 "axios": "^0.21",
"lodash": "^4.17.19",
"vite": "^2.1.0",
}
}
Next, add it to your vite.config.js.
import reactRefresh from '@vitejs/plugin-react-refresh';
// vite.config.js
export default ({ command }) => ({
base: command === 'serve' ? '' : '/build/',
outDir: 'public/build',
publicDir: 'fake_dir_so_nothing_gets_copied',
build: {
manifest: true,
rollupOptions: {
input: 'resources/js/app.js',
},
},
plugins: [reactRefresh()],
});
Finally, you’ll need to add an extra script in your development snippet.
<script type="module">
 import RefreshRuntime from "http://localhost:3000/@react-refresh"
 RefreshRuntime.injectIntoGlobalHook(window)
 window.$RefreshReg$ = () => {}
 window.$RefreshSig$ = () => (type) => type
 window.__vite_plugin_react_preamble_installed__ = true
</script>
<script type="module" src="http://localhost:3000/@vite/client"></script>
<script type="module" src="http://localhost:3000/resources/js/app.js"></script>
Happy hot reloading!
Vite with Laravel: Using Vue.js
To transpile Vue single-file components, install @vitejs/plugin-vue. If you are using Vue 2, install vite-plugin-vue2 instead.
 {
"private": true,
"scripts": {
"dev": "vite",
"production": "vite build"
},
"devDependencies": {
+ "@vue/compiler-sfc": "^3.0.6"
+ "@vitejs/plugin-vue": "^1.1.5",
 "axios": "^0.21",
"lodash": "^4.17.19",
"vite": "^2.1.0",
"vue": "^3.0.7"
}
}
Next, we’ll register the plugin in our Vite config.
// vite.config.js
import vue from '@vitejs/plugin-vue';

export default ({ command }) => ({
base: command === 'serve' ? '' : '/build/',
publicDir: 'fake_dir_so_nothing_gets_copied',
build: {
manifest: true,
outDir: 'public/build',
rollupOptions: {
input: 'resources/js/app.js',
},
},
 plugins: [vue()],
});
Ready for takeoff!
Vite with Laravel: Using Tailwind CSS
Vite includes PostCSS support, so adding Tailwind doesn’t require too much configuration.
First, install Tailwind and its peer dependencies postcss and autoprefixer.
 {
"private": true,
"scripts": {
"dev": "vite",
"production": "vite build"
},
"devDependencies": {
+ "autoprefixer": "^10.0.2",
 "axios": "^0.21",
"lodash": "^4.17.19",
+ "postcss": "^8.1.10",
+ "tailwindcss": "^2.0.1",
 "vite": "^2.1.0",
"vue": "^3.0.7"
}
}
Next, all you need is are tailwind.config.js and postcss.config.js files.
// postcss.config.js
module.exports = {
plugins: {
tailwindcss: {},
autoprefixer: {},
},
}
If you’d rather not have a separate configuration file, you can inline the PostCSS configuration in vite.config.js.
// vite.config.js
export default ({ command }) => ({
base: command === 'serve' ? '' : '/build/',
publicDir: 'fake_dir_so_nothing_gets_copied',
build: {
manifest: true,
outDir: 'public/build',
rollupOptions: {
input: 'resources/js/app.js',
},
},
 css: {
 postCss: {
 plugins: {
 tailwindcss: {},
 autoprefixer: {},
 },
 },
 },
 });